Follow Me on Pinterest

Saturday, April 28, 2012

Last but not least: Craft Room Update

Here I thought this would be an easy fixer upper and its turned out to be more of a project than I had anticipated.  But no worries, I am lovin every minute of it!  Originally I had no thoughts of painting...as much as I would love everything to be "matchy matchy" thats not usually in my budget.  Over the years my room has been put together with the odd pieces of unused furniture.  That works for me because the goal was to have workspace...and that I have.  However after posting the original pics and looking thru Pinterest at other craft room re-do's, it got me to thinking that I could do some spiffing up along the way.  A while back I found a fellow freecycler that had some open and partially used wall paint to give away.  Because I am always painting something somewhere.  I picked up about 20 cans of paint.  A couple of them were too dry to use, but many of them had at least half or more still left.  The two colors that I chose were what I would call a "raisin" and a "dusty rose"...I have to say, man...I am lovin it.  I never imagined that this old work bench could look so pretty!

So today I will give you a peek...
This workbench was in the basement of our house when we moved in 16 yrs ago, and I staked claim to it immediately.  In the beginning I had a desktop that I laid over it...later I was given some bigger tops that I now use in an "L" shape for my work area (along with an old dresser for the other side).  The bench looked just as it did in the before.  Rough and not pretty but serviceable still.  

So...with this part painted...it seemed kind of silly to leave the dresser unpainted that holds up the other side of the workbench top.  :)  Am I right?  Unfortunately I wasnt smart enough to get a before picture of that one...the only pic I have is of the back of it.


Now of course since I have done these two pieces...I am considering a couple others as well.  Hoping that between the two cans I have enough to do what I want.  But if nothing else these two pieces look great.  I even managed to fix the shelves in the dresser so that they are once again flat and as you can see below work beautifully to hold my tubs filled with ribbons etc.

I still have so much organizing to do.  But slowly I am getting there.

I took two bookshelves that are the same height and laid an old top from a desk across them to make yet another work area.  If you look on the left side of the picture you can see the white bookshelf.  Later I will show a close up of that area but was tickled that my dry erase board was the perfect front for the white shelf.  I popped a couple hinges on it and attached it to the shelf.  Inside are all of my paints and now they are hidden away from curious 3 yr old fingers.  I am considering painting those two shelves to match with the rest...we will see if I have the energy to back it up! ha!


So it seems that the craft room will be an on going deal while I craft around and thru the process.  I hope that you have enjoyed a peek into my craft world and hope that you come back again to see more. 


A recycle/upgrade/organizing project!

While in the midst of this organizing rearranging cleaning project...I wanted to find a place for papers, cardstocks,etc.  These things were in different places and it was time to get them all together.  Years ago (talking like 13-14 years ago) I purchased this card board 4 drawer put it together yourself  small dresser.Over the years its been used in a variety of ways and rooms.  Most recently (with in the last 3 years) it was cut in half to make two smaller "dressers" with 2 drawers each.  I had to tape in a false bottom at that time to make it work, but once again it was in use.  Now however its time to do that again but wow, it's pretty worn looking.  Hmmm what to do?  Lets see.  No money to spend.  But I do have some left over contact paper from (again) years ago.  Lets see what I can do to these bad boys to make them a bit more presentable.   

This is one of the two that need done.  As you can see they have had better days.

Even tho they are beat up they still have some life in them!  I had two rolls of contact paper from a fathers day project years ago.  Both with a marble look to them.  I knew that I only had so much paper and made the decision not to cover the back or the bottom of each set.  Only minimal parts of the inside were done as well.

The finished product!  I have to say I am pretty pleased with the way they turned out.  :)

Close up Front (yes, I know more practice with lighting!)

Side view.

I really love the way they turned out, but now I have two other issues lol.  
First, I am afraid that my cardstocks and cards that I want to reuse are a bit too heavy for these drawers.
Second, the paper doesn't really match with the paint work that I did on my workbench (next post to show that)
So...I will be looking for another solution to organizing the papers but until then this is their home and I am absolutely positive that they will get good use no matter what I wind up using them for!

Garbage to gold.  Love it.

Our "mini kitchen" for our Mini!


I believe I mentioned in a previous post that my little one has quite the kitchen set up.  She actually has two kitchen centers and a ton of stuff to use in it.  I do not understand the thinking behind the design on some of these kitchen centers.  The compartments are all rounded at the back corners and many of them have ridges in the shelves.  Why is that an issue?  Well when trying to put baby bottles in the fridge they don't even stand up!  Things wind up falling over and it really doesn't make sense to me.  So here is our solution.  Good old plastic canvas, which I happened to have in quantity here at home.  I made open top boxes to fit inside of all of the cubby holes on both kitchen centers.  I have to say they have really worked out great and now the Little Miss has plenty of storage room and is herself learning to organize.  Never too early to teach that!

The placemats for her table.  Complete with pockets for silver and a loop on the side for a napkin.  Yes we had napkins in there...she got to them before Momma was able to get her pictures done.  


Add caption
The upper portion on one of the kitchen centers...again curved corners at the back  made it hard to put more than a couple items in there at a time with out a land slide.  The open box on top to hold her coffee cups and the simple shelf below for her plates keeps it all together. 


This little cubby hole above the fridge was just perfect for all her canned goods and the drawer slides in and out easily.  We made a large round one for her fridge to hold her eggs.


The fridge on the other kitchen actually had a shelf in it...again with rounded back corners.  3 boxes help to keep all her baby bottles and milk jugs in order. 


Here are her bins with all of her food stuffs sorted out and easy to get to.


Add caption
We even saved some plastic containers from the recycling bin and  prepackaged some of her food.  You know, for when Burger/Sandwich/Chicken Dinner fast craving.  :)  My plan is to make some cool stickers to put on the top with a Mom made logo for her "Mini Kitchen".


I just thought I would show you this as well.   Little  Miss has this easel that she uses daily for painting.  While cleaning the craft room I found some rolls of fax paper....hmmm what do I need these for?  Light bulb blinks on!  A sturdy piece of string thru the middle and over the top holds it and she is able to pull down fresh paper when needed.  After the initial conversation about not pulling down more than needed (as half of it was on the floor and mommy was rolling it back up...) she has done great with a little at a time.

There is a bit of our Little Miss's messy kitchen.

Friday, April 27, 2012

"Mom's Podge" and Pinterest

Pinterest, Pinterest, Pinterest!!!  Yes, I admit.  I am addicted.  No.  I dont want help with my addiction.  I am happy finding finds each time I look.  I am inspired and feel the kindred spirits out there.  No matter what you like/love/crave/want/have/need/...it's there!  Personally I am addicted to anything craft and that's my main focus.  Though I have strayed into other areas. Please feel free to take a look.  Be inspired!  I know I am!

So in my Pinterest travels one of the items that I came across was the home version of Mod Podge. I was stunned to see that it was the same thing that I had been doing here at home for years...I guess I just never put it together before.  Talk about a light bulb moment.  Again I was ahead of my time and didnt even know it!  ha!

But I will take it one step further for you.  I don't know about you...but I get this thrill when I am able to save something from being tossed into the garbage and save money at the same time!!  So, don't throw away those bottles of glue that are drying out and kind of gummy inside they can be "recycled".   I happened to have quite a few bottles of glue like that.  I found them while organizing in the project craft room and decided that I would share my "Mom Podge" project with you.

From garbage to gold...


These were the supplies that I used.
*Gummy Old White Glue and Tacky Glue
*Water
*Bottle to store Mom Podge in
*A wooden skewer (used for breaking up and stirring glue when still in bottle)
*double boiler
*whisk
*strainer


This is the container that I chose to use for my Mom Podge.
I had a couple bottles of white glue and a smidge of Mod Podge that hadn't gone gluey yet.
I used a couple large rubber bands from top to bottom to hold the bottles upside down so
they could drain while I worked with the other stuff.


These are some of my gummy gluey ones.  As you can see they were solid enough that the wooden stick I had to stir with stood up straight lol.  I put a bit of water in each bottle and put 6 in at a time to warm.  I did NOT move away from the microwave while warming them.  Well... I didn't after the first time.  NOTE:  DO NOT OVER HEAT.  Result: Icky burning smell...and bubbling white (now yellowish) glue on the roof of the microwave.  *sigh*  So...a few seconds at a time warm them, stir them, add more water if needed and repeat the process until you have the consistency of glue.  If your glue is as far gone as mine and you have as much as I did...keep reading.


As you can see after heating a bit, I did still have some lumps.  With the quantity that I was working with I after getting mine to the "lumpy" stage, I dumped it all into a double boiler to finish off.


Low fire a lot of stirring adding water if needed. That's the hard part.  I can hear some of you out there saying..."How much water?"  I cannot tell you that.  You will have to eyeball it.  Better to start with too little than too much.  Any water added will help the softening process when heating it.  Sorry that I cannot be more specific, but it really depends on how gummy yours is.  When I felt that I had gotten as much of the lumpiness out of it that I could I set up my strainer and receiving container...


I set up this shot above and thought "Huh...that's not gonna work!"  I would suggest that if your strainer is this big and your container that small you find the appropriate size receptacle to catch your Mom Podge. 


As you can see after letting the liquid run thru I still had some firmer pieces, I used my thumb to work those through the strainer and into the liquid.


It was beautiful!  White and creamy.  I poured it all into my the container that I had chosen to store it in, closed it up and left it on the counter.   Several times throughout the day I gave it a good shake.  By the end of the day it was back to the consistency of white glue.  From there I added water to bring it to the consistency I wanted.  


Here is my final product.  :)

Ok some credits here.  First as you know I found it on Pinterest.  That took me to doityourselfdivas.blogspot.com/2011/09/diy-mod-podge.html
and that took me to

Thats where the light bulb above my head went off and I said "huh, cool"

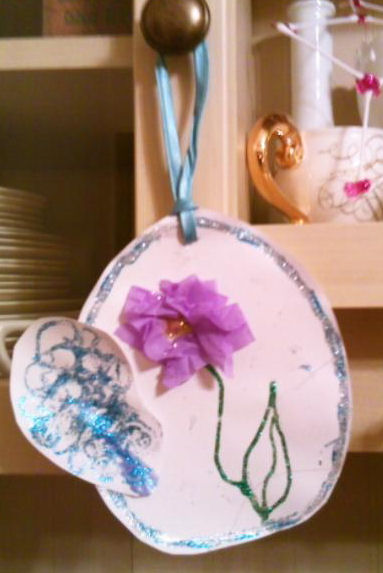
Here are two of the items that I have used the Mom Podge on.
The heart is from this past Christmas and the Chest on the right was done at least 12 years ago.  
So if you wonder if this works and holds...Yes...Yes it does.

So...give it a try...save some glue from the garbage today!
                                                                   Have fun!


Easter...late

Just like Easter sneaking up on me...it has flown past so fast!  Even though Easter is over, there were a few pics of eggs that I wanted to share.


The ones above were our Easter project this year.  The two on the right my 3 yr old did and that top one hung in my kitchen window.  It made me happy each time I looked at it.  The lower one is much prettier than Momma's picture taking skills...but hey I am working on that.  Like everything else its a slow learning process.

Some of our Easter eggs.  The top two were painted with white glue and a dab of food color.  The bottom with paper doiley pieces.  It was fun the way it "framed" the center flower.  Different if nothing else.

Now, Easter is officially over.  :)

Coming up...

Hello world!  Ohhh so much to show since last posting.  Life has a way of steam rolling in and taking over.
Lets see...a quick run down of things that will be appearing .

* Pics of some of our Easter Eggs from this year, we had fun trying a couple different types of decorating them.
* My "Mom's Podge" project and a ramble on Pinterest.
* Pics of my little ones kitchen center and some of the things we have made for that.
* Update pics from the craft room redo/make over/clean it up and organize project.

Whew!  I have been busy since last posting and now I can show some of the results.
Enjoy a slice of my life.

Wednesday, April 11, 2012

The make over

Craft room before.

As you can see above quite cluttered!  


A week later..

Hello and happy Wednesday.  I guess that it is a good thing that I put in my disclaimer!  Life is busy and tends to take me away from the play time I want.  But just so you know I haven't just been building blocks with my "Little Missy" but have been organizing and crafting too!

I tend to jump around on projects depending on the time and area that I am crafting in.  As I read more blogs on this subject I see I am not the only one that crafts all over the house...tho I am really making a conscious effort to get this room in order so that I can walk in here and start anything that I want to.  I have made some good progress and will be posting some :before shots" of my craft room.  I will try to get some new pics of what I have done so far, but to the untrained eye it might look like a bigger mess! lol  You know how it is...as you organize you go thru things...well...let me tell you I had some things to go thru!  YEARS of boxes that had gotten put up on some shelves in my basement.  Incredible some of the things that I am finding that I will be using soon!  Funny isn't it how our craft tastes change over the years?  Myself, I am 46 and have a mid life baby ... well she will be 3 soon.  But I have older daughters that are nearly 27 and the other just turned 21!  When the big girls were younger, we crafted all the time...kid geared, family fun type things and as they got older the crafting was replaced with life.  My tastes changed and I did more crafty adult things and tons of cross stitch.  As they got even older, and the youngest at that  time was getting ready to graduate and move on to college (just previous to discovering I was pregnant!) I was barely crafting at all.  I like to play Sims and had moved on to other computer games etc.  Since the birth of this precious little one of mine, life has flipped up and over and I now find myself playing duplo blocks and playdoh all over again.  It is interesting to do this whole baby deal at this point in life with already having had the parenting experience.  I find that I am more patient to let her find and discover her own time to learn things rather than pushing it on her...of course she would not have that any way.

Anyway I digress!  In the past week I have indeed worked on moving around my craft room and for the most part I think I am happy with the arrangement of the big pieces and now I am on to re-organizing every thing else.  I decided to move my sewing area into a small "guest room" that we have on our first floor.  We don't have guests for the most part and my HUGE desk is in there...so might as well utilize the rest of the space.  The closet in that room already holds the tons of fabric that I have boxed up so maybe if I move the sewing machine closer to the fabric it will magically turn into some wonderful items.  :)  Or...I can stick with the plan to get in there and organize that area too!  So another upcoming project my sewing room/area.

On top of all the mess I have created by moving things around and dragging old dusty boxes in here, I have been working on some items for my little one's playroom.  Mainly her kitchen center area where she loves to create and imagine.  We bought her a kitchen center for Christmas in 2010 and since then my sister showed up one day when coming to visit with another kitchen center!  When I asked her where she got it, she said "Mom and I saw it on the side of the road so we backed up the car and grabbed it!"  I still laugh when I think about it, but now we have two and its really worked out fun for us.  The "found" one is in excellent condition and even tho it is not the same as the old one the colors work well together.  So I have been making simple boxes for her to put her kitchen center goods into.  I will post pics of that too to show you what I mean.  I also just made some really cute placemats for her table that have pockets for her silverware and a napkin ring.  She told me when she looked at it that it was "Gorgeous" lol.

I could go on and on about all I want to do, all I plan to do and all I HOPE to do, but for now I will have to end this post and get to the tasks at hand.  Be on the look out, pictures of the Before craft room coming up soon.

I hope that your day has been a good one and that your evening is restful.
Blessings to you all.

Tuesday, April 3, 2012

The beginning...

Good Tuesday Morning World!

Here today we have cool weather but with some really bright sunshine...the kind that makes you say....mmm what shall I do today?  For me personally, I hope to get some pictures uploaded here of my craft room in its current state...BEFORE I start to take it apart and re-organize it.  The room that I use for my craft room is I guess supposed to be a formal sitting room or living room.  In all the years we have been in this house that room has never been either of those things lol.  I guess we just are not the formal sort, not that there is anything wrong with that, but its all about comfort for us.  Anyway over the years I have collected odd pieces of furniture and shelves that I have made work for my  area and have had it in many different configurations but with the onset of spring and summer its time to move it around again and re-organize.    Change of season does this to me ... I have this internal need to move furniture!  I blame my mother lol.  I have to say that this is one of the first times that I will do this and I really do not have any idea how it will turn out.  I am a rather eclectic crafter.  I want to learn and do it all and I want to do it MY way and hopefully recycle things along the way.  After all that's my main goal to recycle.  But when setting up a craft room that presents a problem of organizing all the pieces so that they are convenient to get to etc.  So in my journey to redesign this room with NO money spent, only using what I have on hand, I hope that you will join me and find some inspiration along the way.... or if nothing else a laugh or two.

A couple things or thoughts before I sign off for now.
First:   I dont know how this blog will go.  I might be posting all the time and I might have times that I dont.  I hope that I will get to the point that it will be a regular thing, but I am new to this and learning as I go so please bare with me.  :)
Second: I have a nearly 3 yr old that I am keeping up with so my time is broken up into segments of minutes most days (unless its after 8pm and then I am too pooped to do anything lol) rather than hours.  So my postings might be a tidbit here and there.

Huh...that kinda sounded like a disclaimer didn't it?  :D

I also want to point out a wonderful site for those of you who came here because you too love to recycle.  www.freecycle.org   This is a wonderful idea and I have been freecycling for years.  Please take a moment to check it out.  If you have questions feel free to ask!  But what ever you do, before you toss something away please look at it.  Ask yourself..."Can someone else use this?"  "Can I remake it into something else?" "Can it be recycled?"...please for the love of our children and future generations, RECYCLE!

Stepping off my soap box.

I hope that your day is filled with love, joy, friendship, family and if you are very very lucky hugs from a little one.